
Wood Slat Accent Wall with Shelves
I have seen so many different variations of the trendy wood slat accent wall and I love them all! You can get really creative with them. That’s why when we started working on my son’s room, I was determined to include my own version of a wood slat accent wall.
*This post contains affiliate links. That means that if you make a purchase after clicking on a link, I may earn a small commission at no extra cost to you.
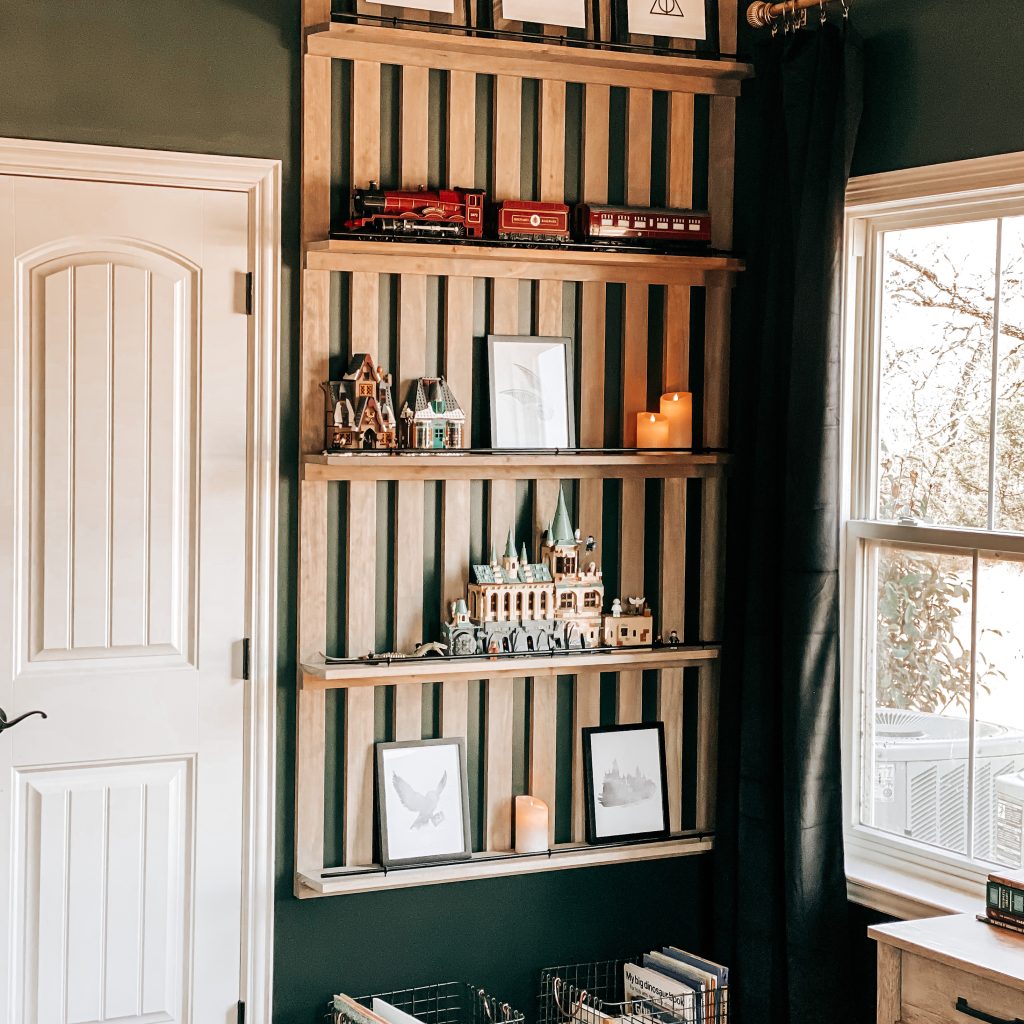
His room is Harry Potter/Slytherin inspired (Read about his Harry Potter Themed Bedroom here), so the accent wall needed to tie into this theme. He loves Harry Potter and Legos and it shows. They are ALL over his room! We decided the best way to add a Wood Slat Accent Wall was to add shelves so that he could use them to store his Legos and any other Harry Potter toys. Style + Function = WINNING! Now that we had the idea of what we wanted, it was time to start building.
First we measured the wall we wanted the shelves to be on. It measured exactly 47” across from the corner to the bathroom door frame. Then we headed out to buy the materials.
Materials:
11 – 1x3x8 pine boards for the wood slat background (We bought one extra just in case we messed up somewhere along the way.)
5- 1x6x8 pine boards for the shelves
5 – 1x2x8 pine boards as our shelf supports
Dowel Rods, Eye Hooks and Black Spray Paint for the shelf rails (Optional)
Tools:
Step 1: Stain
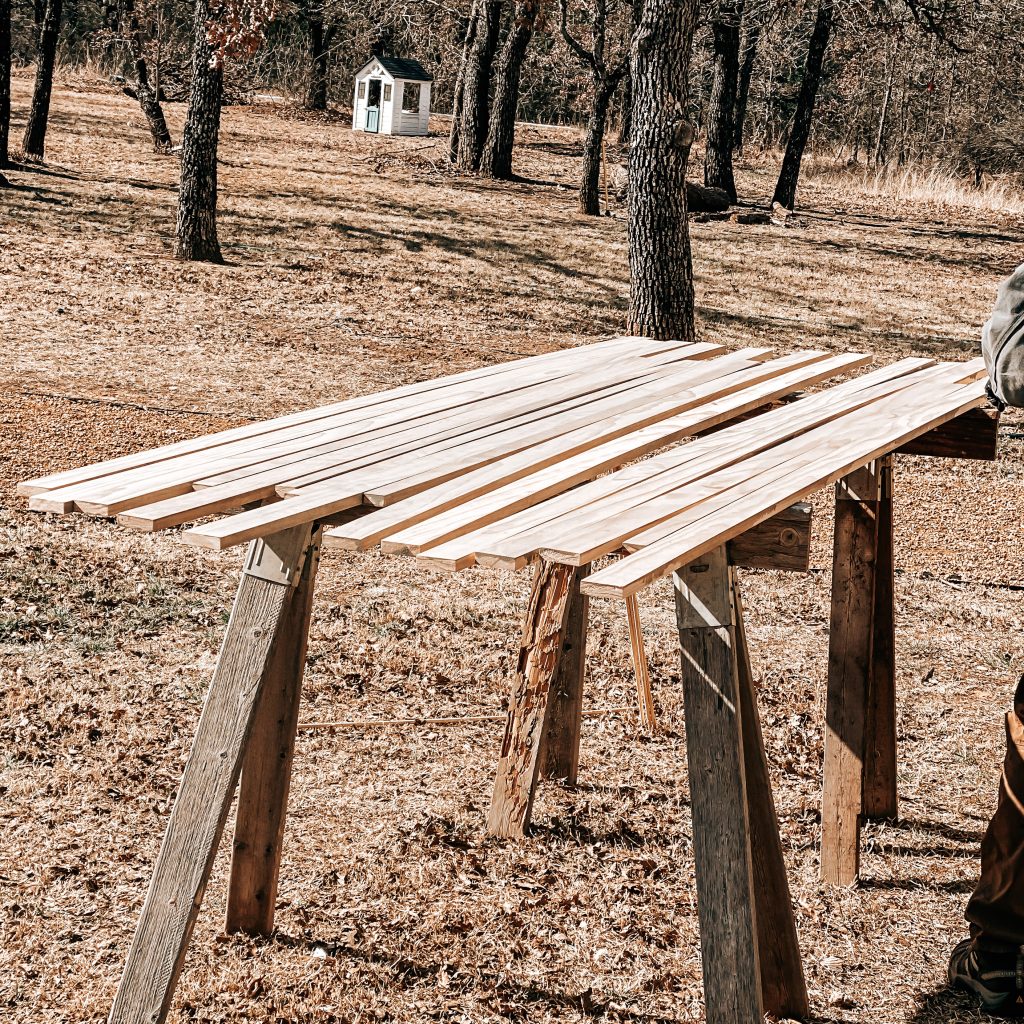
The first thing we did was stain all the wood. I used a stain pad to rub the stain on which is really helpful in getting the stain on evenly across the boards. The stain color I used is Weathered Oak because it matched his existing bedroom furniture and was a really pretty contrast against his dark green walls.
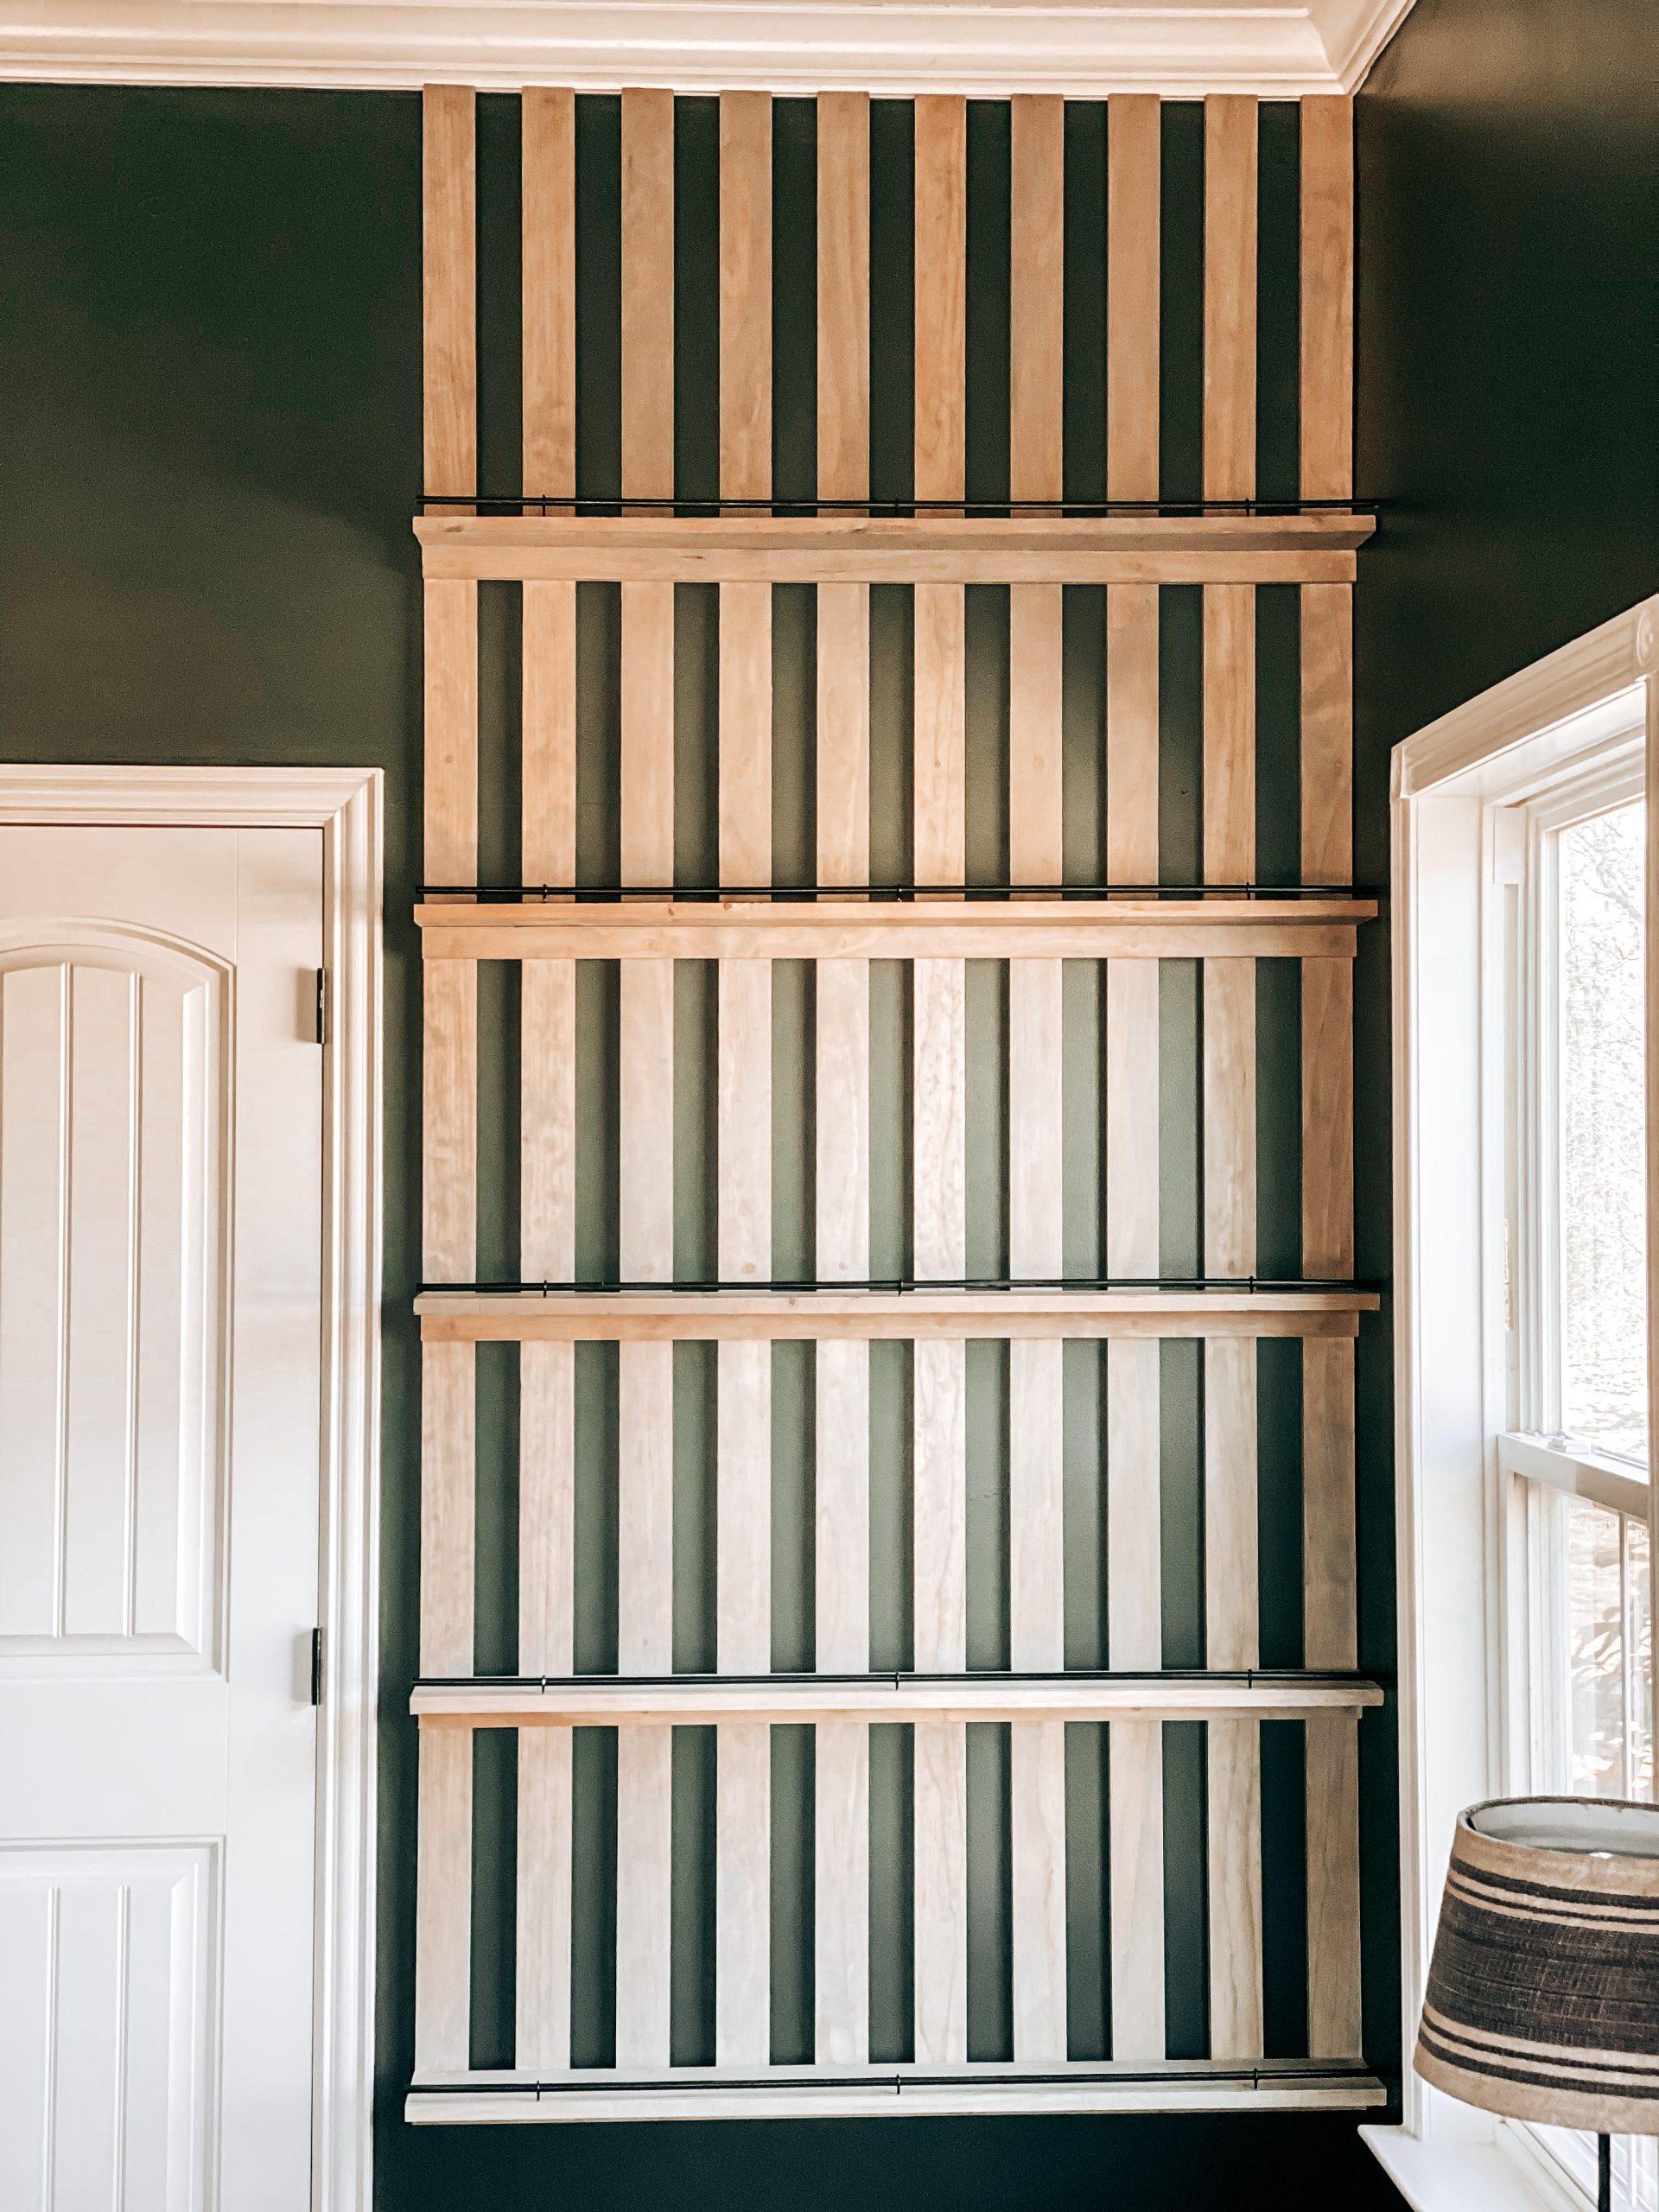
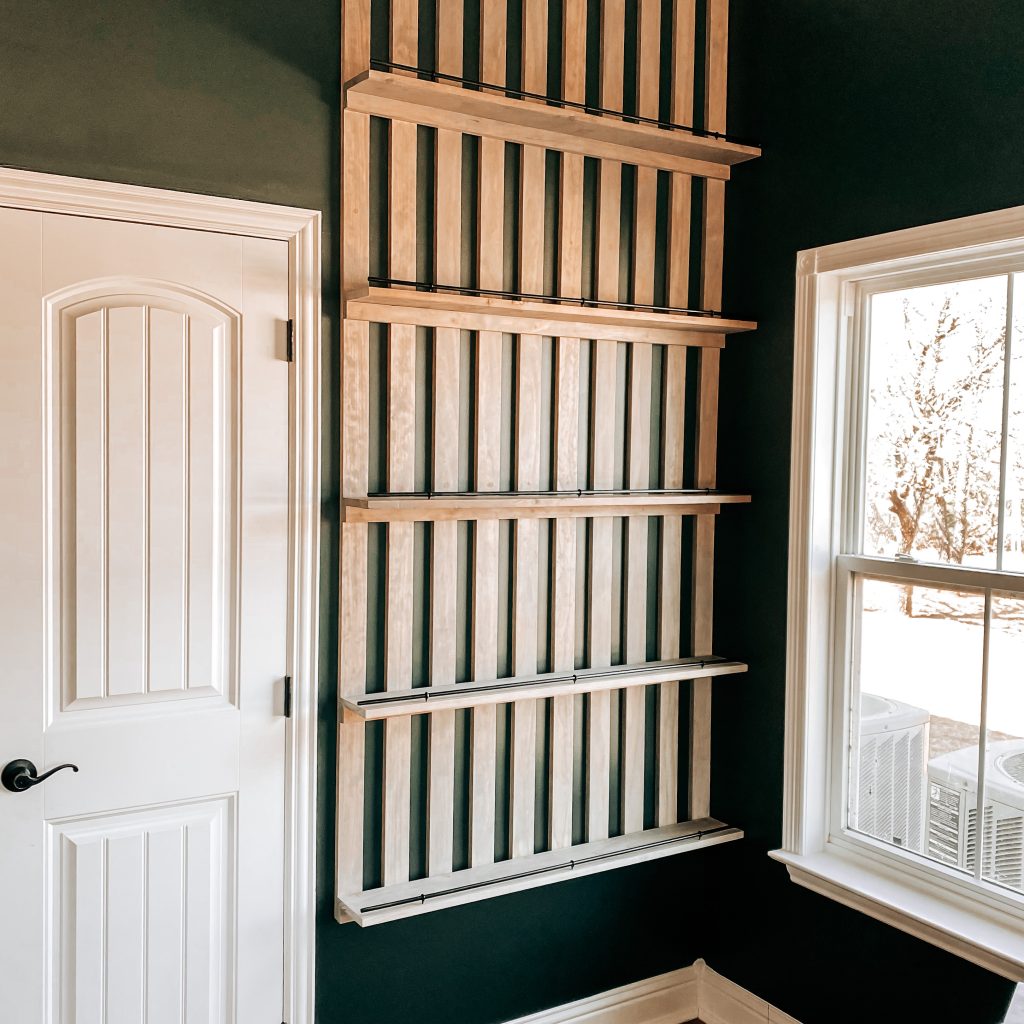
Step 2: The Wood Slat Accent Wall
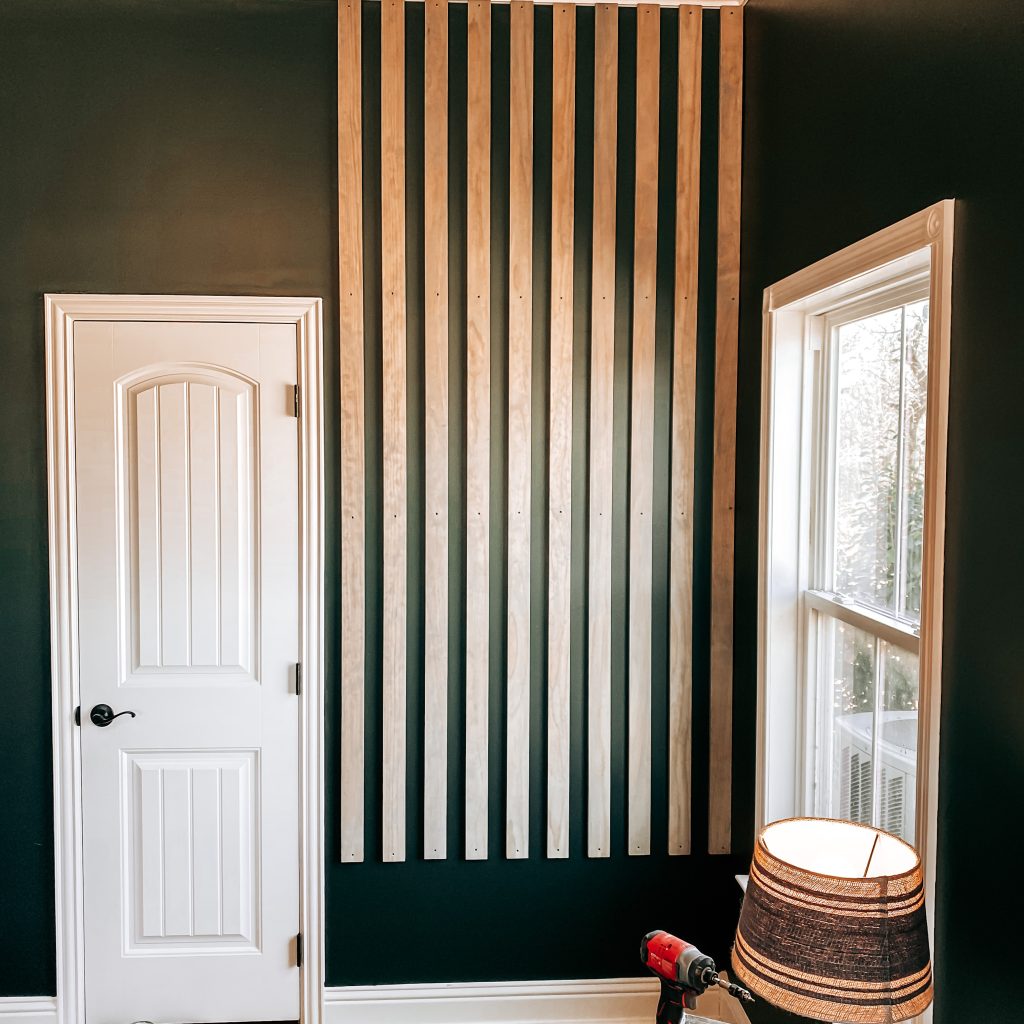
Once the boards were stained and dried, we began lining the 1x3x8 pine boards across the wall to get an idea of the spacing we wanted. We started in the corner and worked our way out. Using the level for spacing made them about 2 inches apart and assured that they were all straight and level. We pushed the boards flush with our ceiling molding and placed the first trim screw at the top. We used the countersink bit to pre-drill 3 holes before placing the trim screws in the slat to prevent splitting. One in the top, one in the middle and one in the bottom. There was no exact measurement on the placement of the screws. We just sort of “eyeballed” it since we knew we were going to fill those spots anyway. Here is what the wood slats looked like once they were all up…
Step 3: The Shelves
Next, we measured from the wall to the edge of the last slat to get the exact length of our shelves. Then we used the miter saw to cut the 1x2x8s and the 1x6x8s to that length. Starting at the bottom of our wood slats, we placed the first 1x2x8 with a level and then screwed it in. Then we set the first shelf on top and drilled into the shelf support. Here it is after we attached the first two shelves…
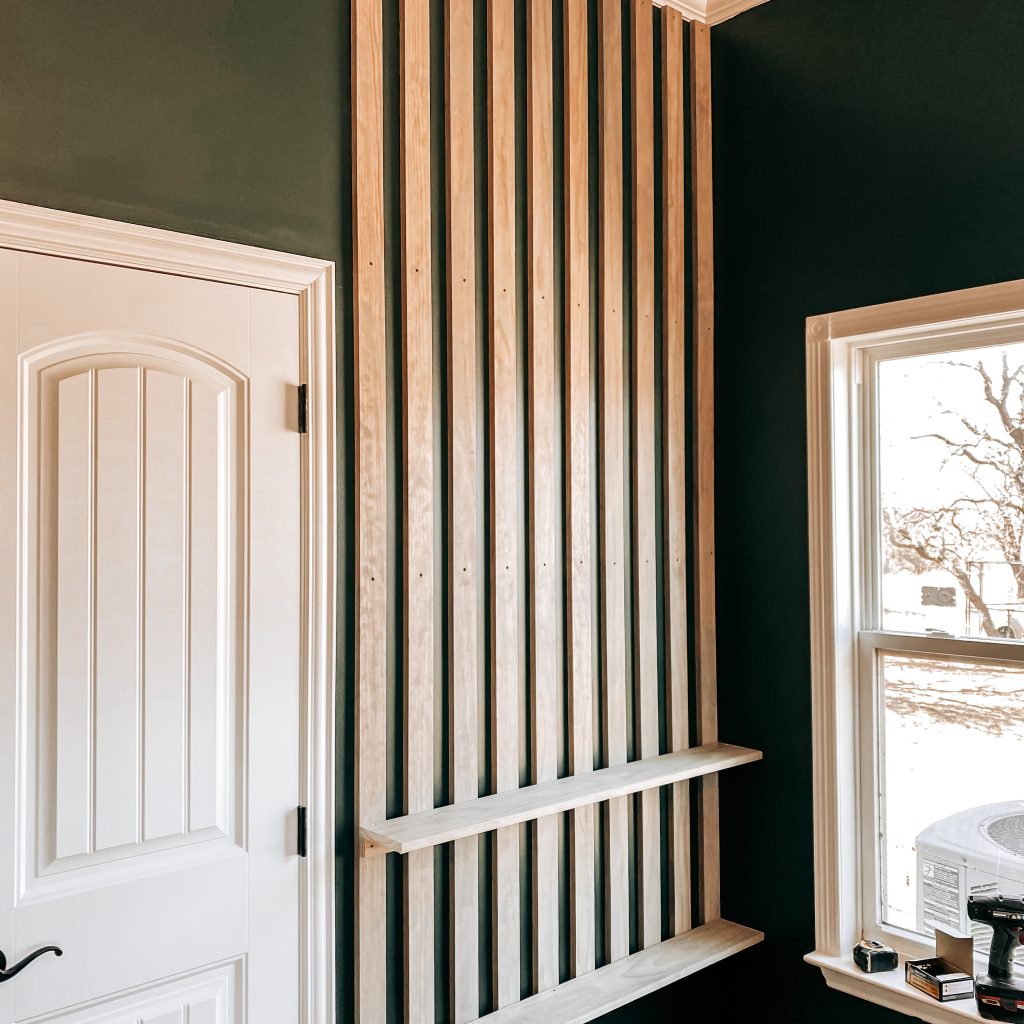
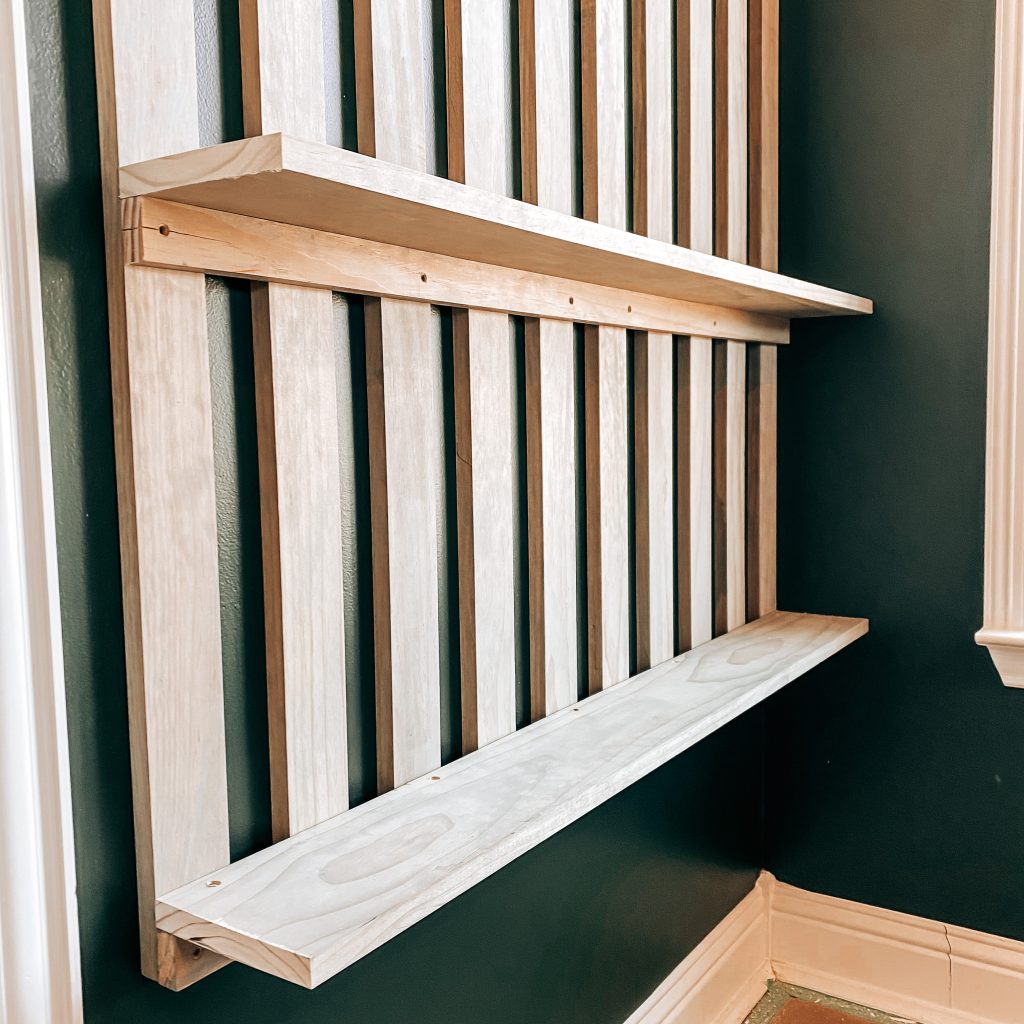
You can see where we drilled straight through the support and the slats into the wall. We tried to make sure we hit the studs for these to make the shelf a little more sturdy. Sturdy is important here because…boys…amirite?!?!
Step 4: Finishing Touches
Once all the shelves were attached, we filled all the holes, sanded them with my micro finishing tool and then touched up the stain.
Finally, it is time for the finishing touches. This last step is totally optional but I think it really adds to the finished look of this DIY wood slat accent wall and shelves. First, cut the dowel rods to match the length of the shelves to make a rail for each shelf.
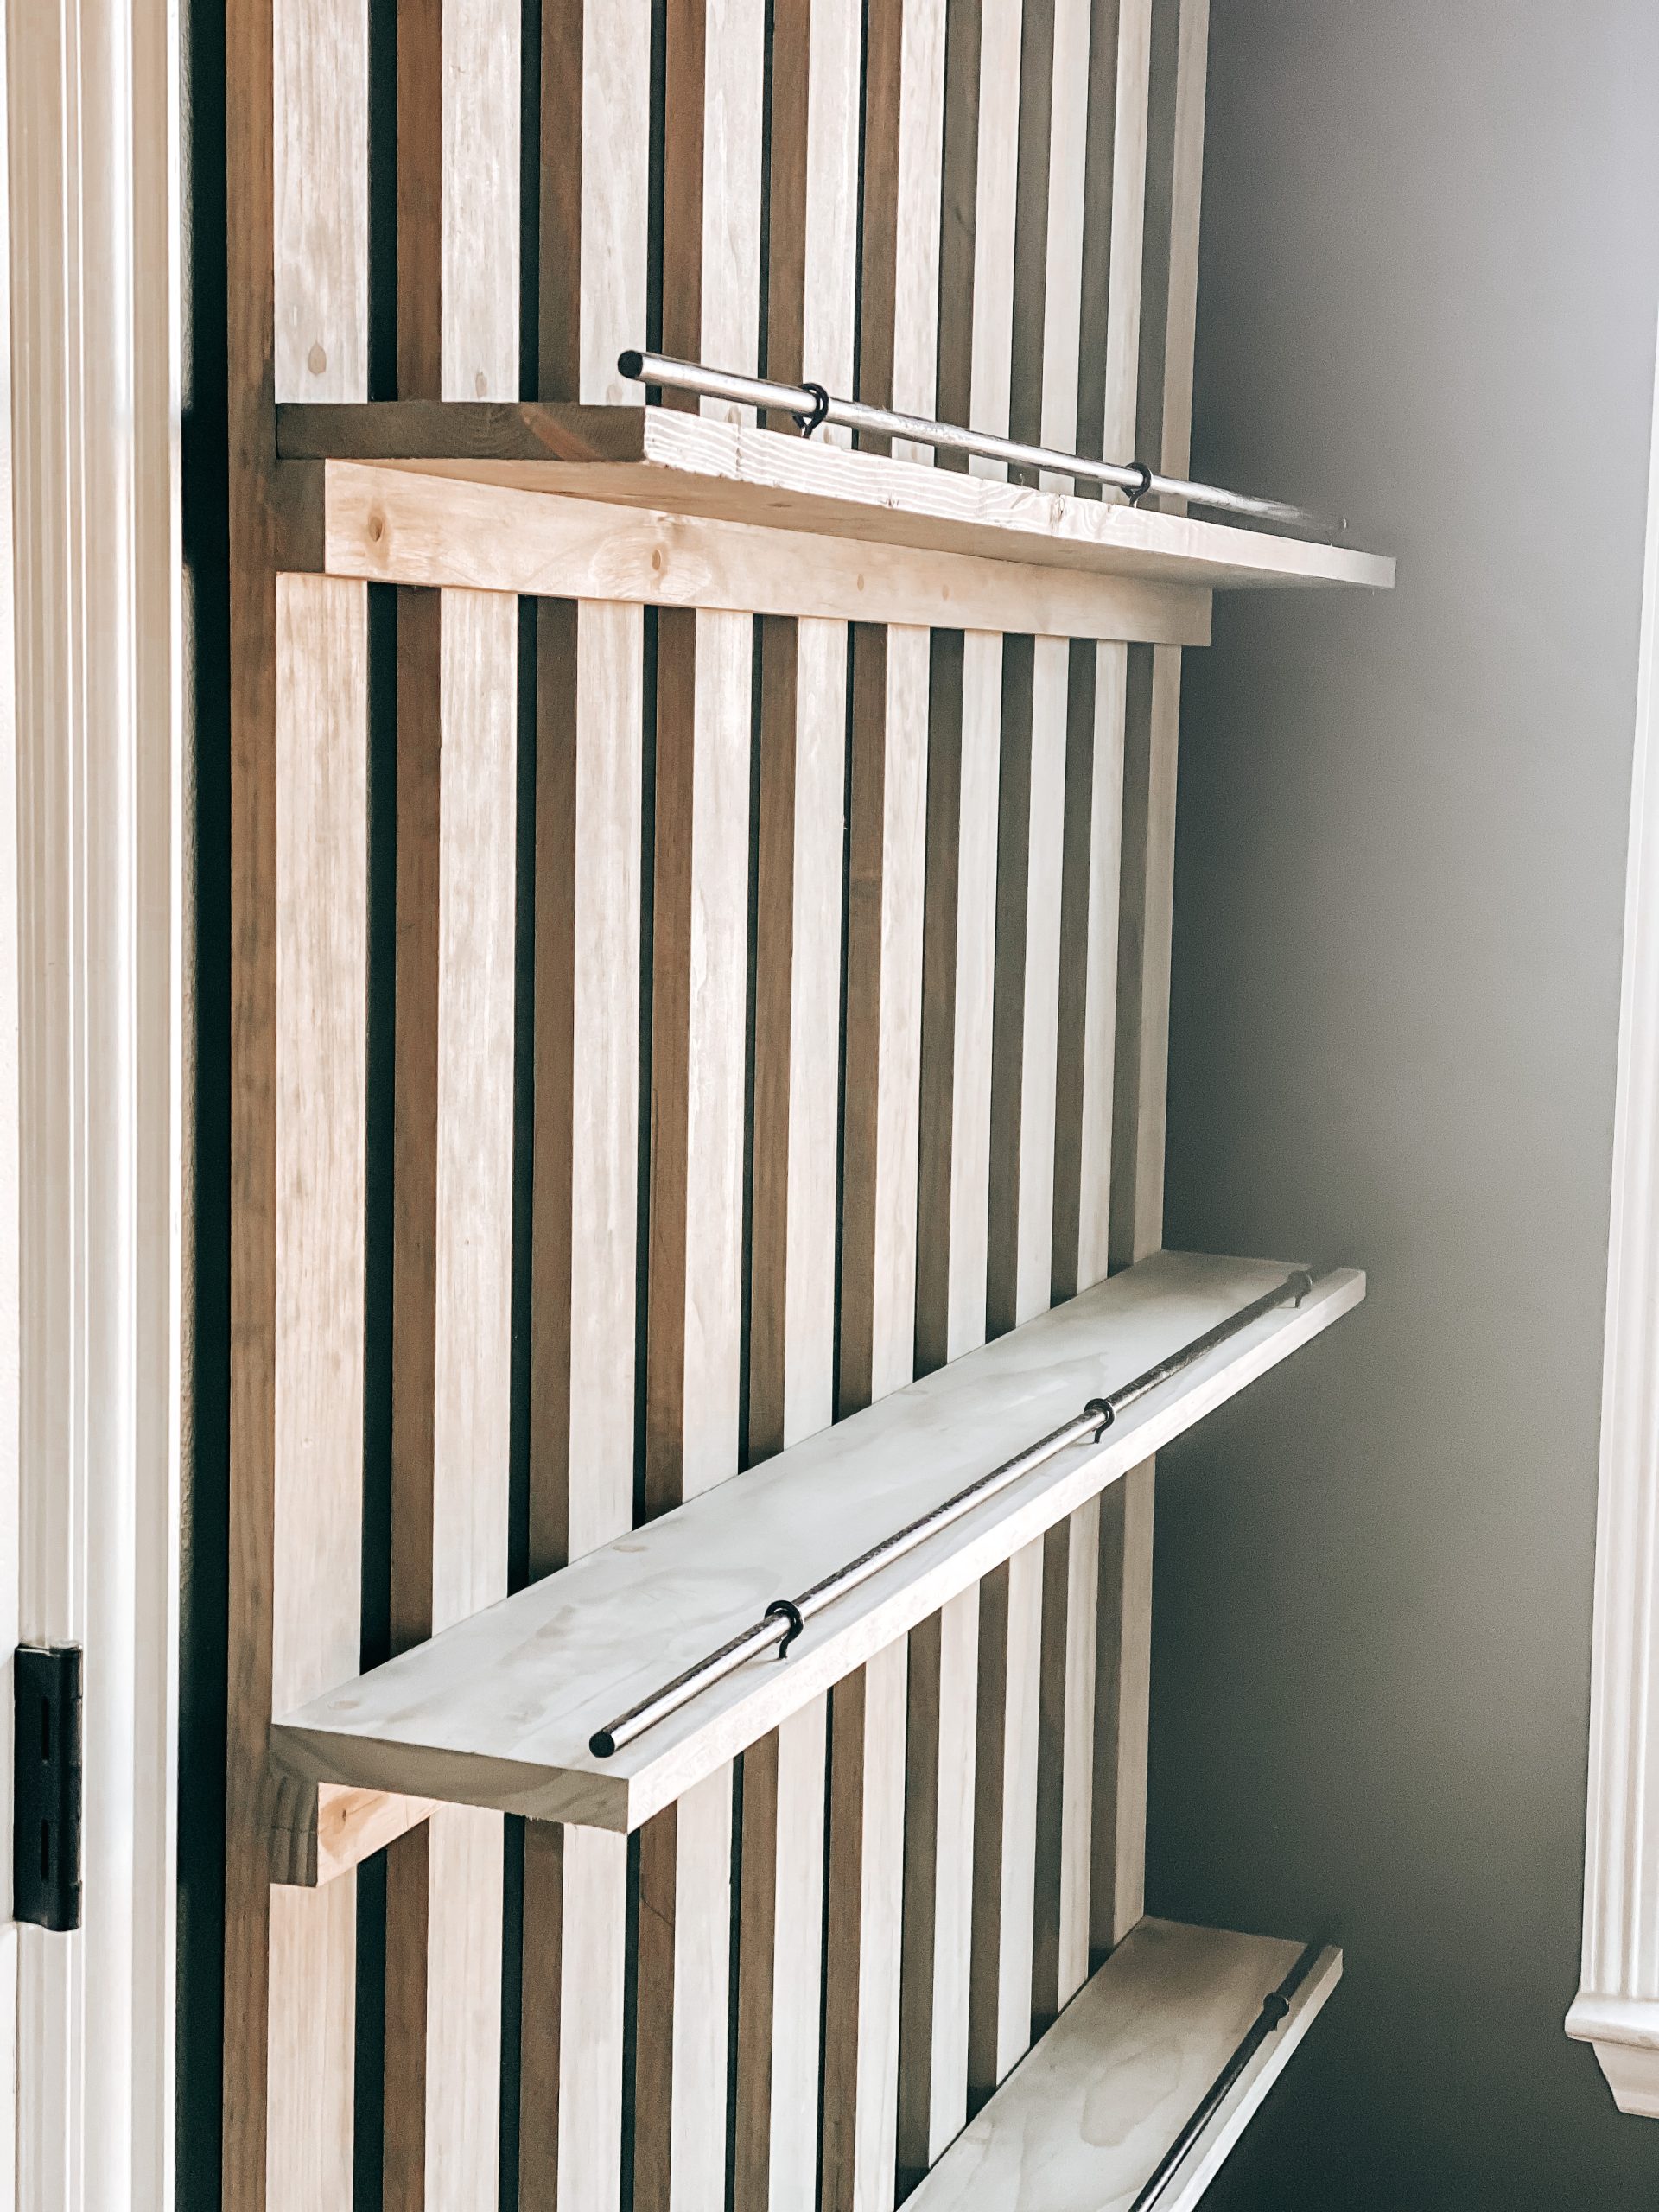
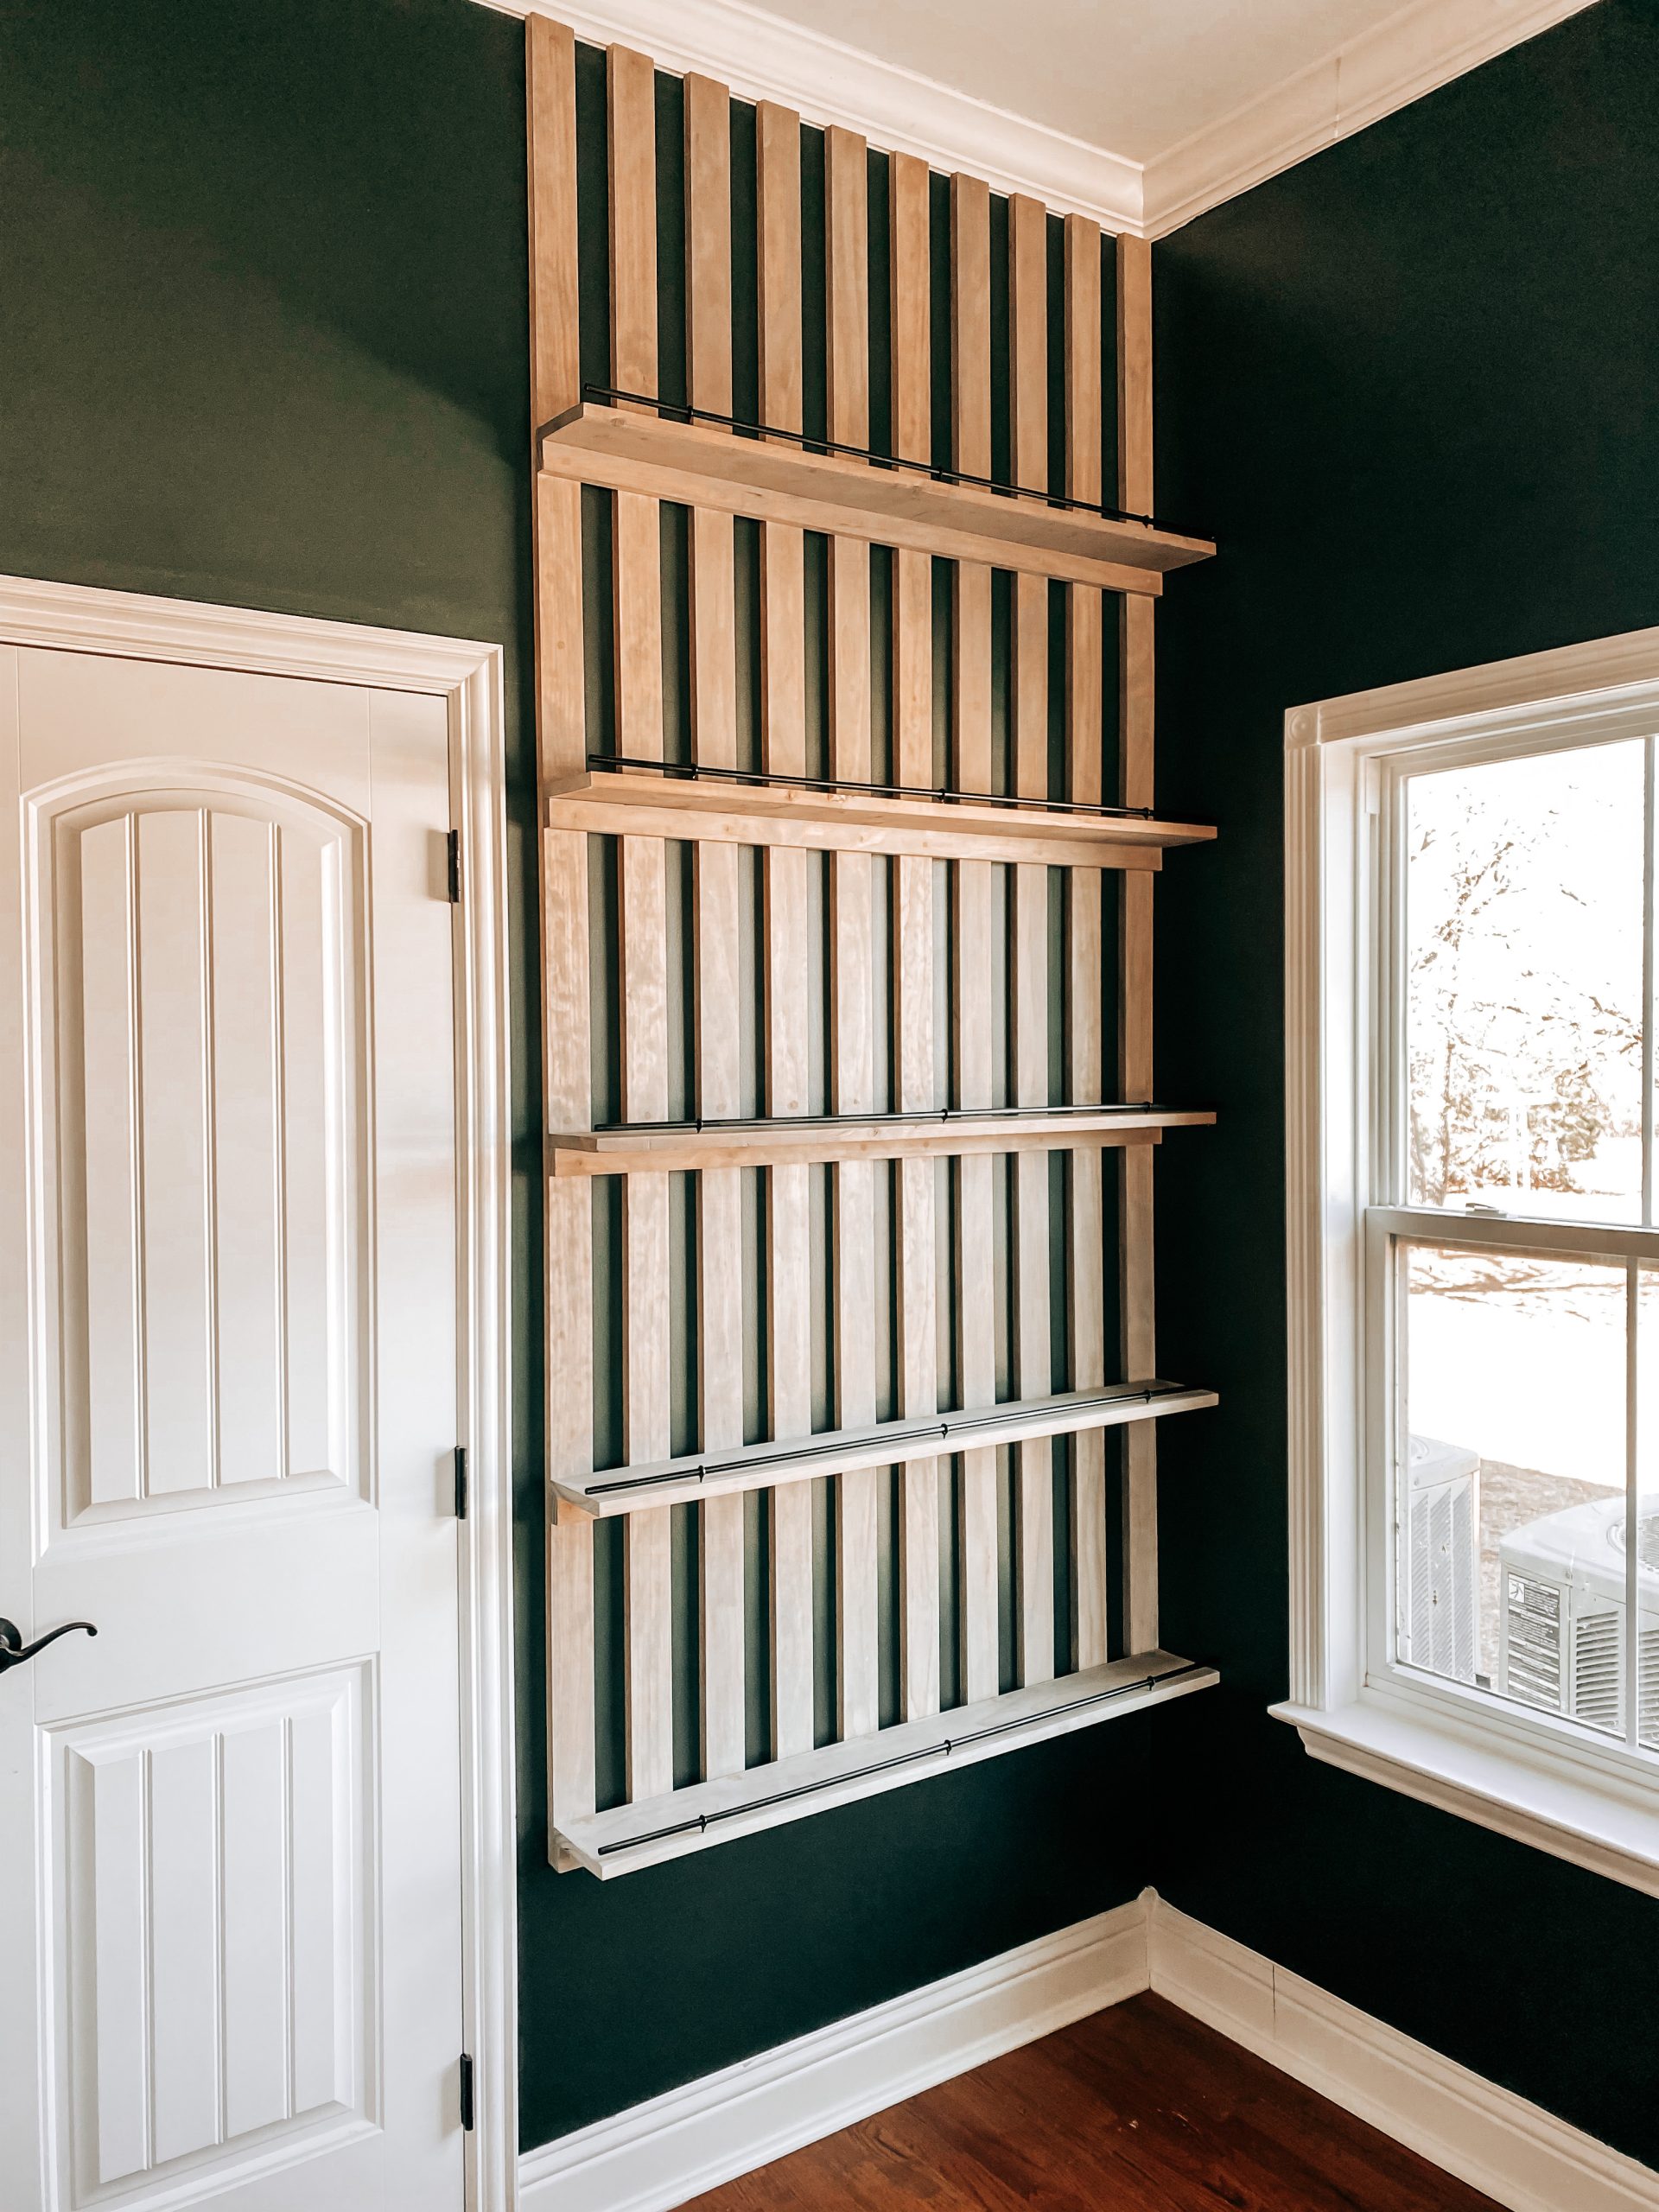
I painted the dowel rods and the eye hooks with glossy black spray paint to give them a metallic look. After they were dry, we used 3 eye hooks on each shelf. We started at the center and then added one to each end. We measured the placements each time to ensure they were all evenly spaced. Lastly, just slide the dowel rods into the eye hooks. Take a look!
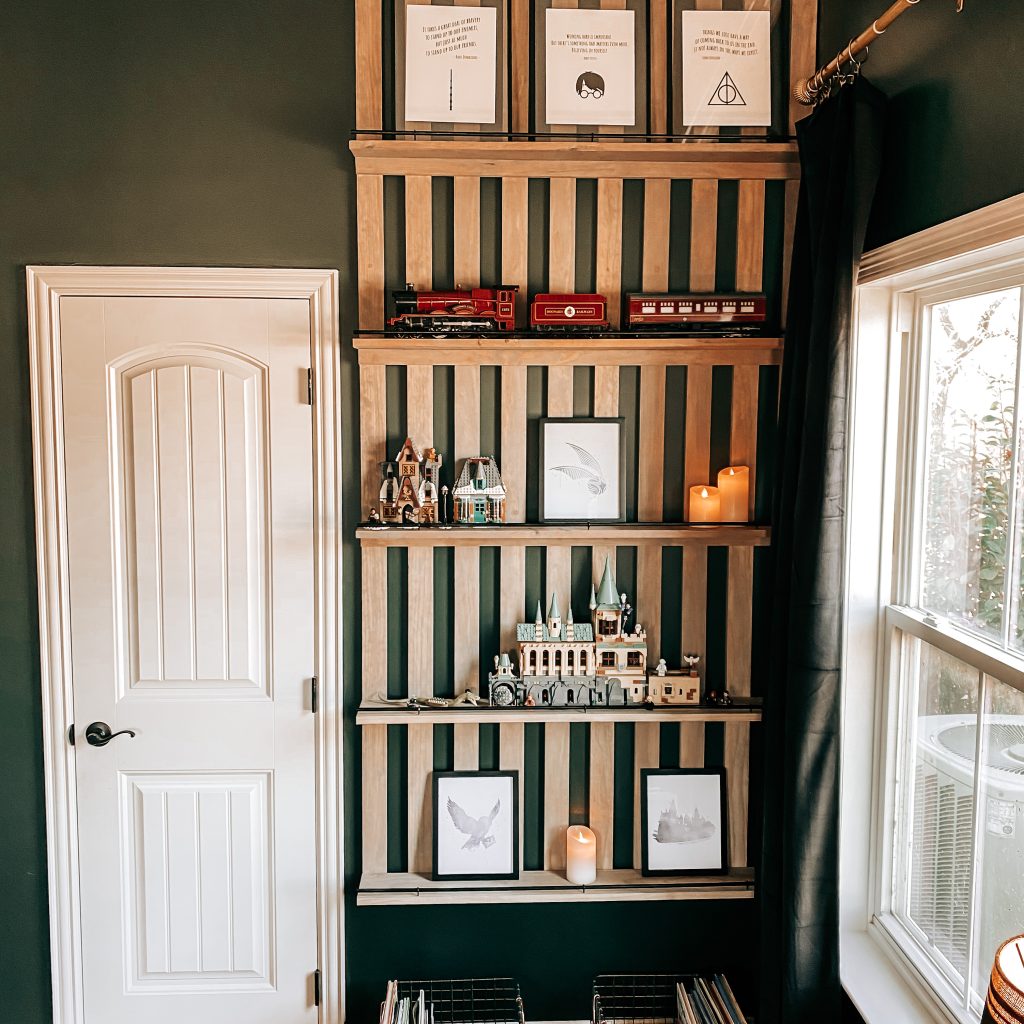
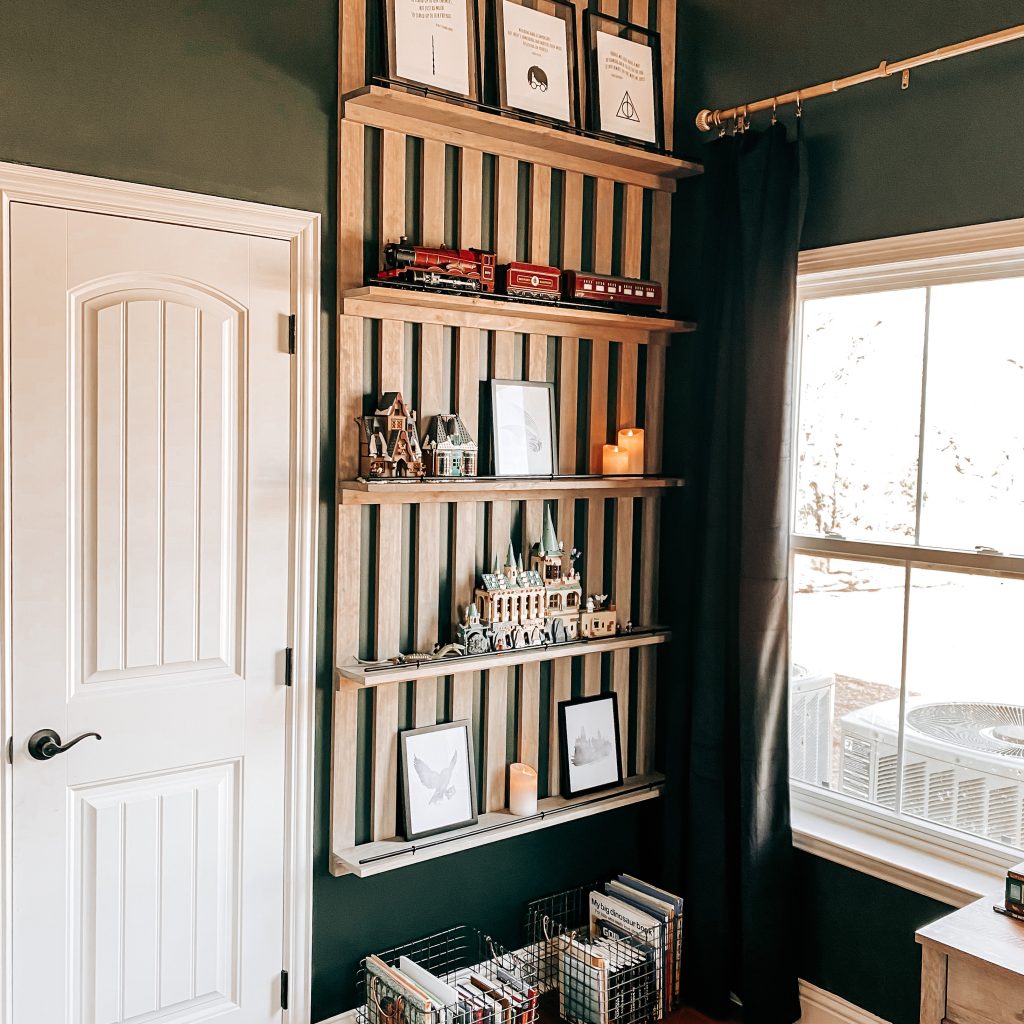
I’m in love! I love the way it combines a trendy, modern style with purpose! It’s also a great space to display Lego masterpieces for my Lego-loving, Harry Potter nerd 😉
I hope you enjoyed our Wood Slat Accent Wall DIY project. You can check out some of our other DIY projects here. I’d love to hear what trending project your wanting to try. Leave me a comment below. Don’t forget to subscribe and follow us on Facebook, Instagram and Pinterest to keep up with our day to day. Thanks for stopping by!
Sources for Our Wood Slat Accent Wall & Styling
Floating Frames | Hogwarts Express Train | Diagon Alley LEGOs | 8×10 Black Frame | Flameless Candles | Hogwarts Castle LEGOs | Wire Book Baskets | Black Velvet Curtains | Gold Curtain Rods | Curtain Clips